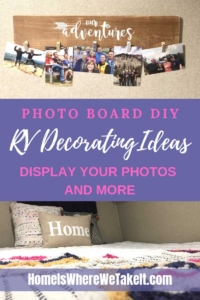
 RV decorating ideas: photo display board DIY…why? Because I need to remember how fun spring will be, that’s why.
It’s gray and dreary in the state of Arkansas this winter folks, IT’S DEPRESSING!
We park our camper beside our house on top of a grassy hill (until you try to move the camper, then it’s a mud bath). Let’s just say, it ain’t movin’ till spring! So sad!
My oldest daughter called and invited me to go to Hobby Lobby with her and that’s where I got my inspiration for this project.
I’ve had three pics propped up in the camper from our Montana trip and wanted a proper way to display them. I found this cute little pack of tiny clothespins and knew exactly what to do with them!
Here are a few RV decorating ideas, more specifically how to make a photo display board DIY!
RV DECORATING IDEAS: PHOTO BOARDS
Why boards? So, here’s the deal: when I saw these little guys, I knew they were destined to hang my favorite pics in the RV. I had boards laying around in my shed anyway…so free(ish) project anybody?! HECK YEAH! I believe I will!!!
Anyway, when I bought these clothespins, I had an image in my mind of a plank with words on it…some travel related saying…and some twine strung between maybe two push pins or screws.
In the idea phase, the clothespins would hang from the twine and hold the pics in place.
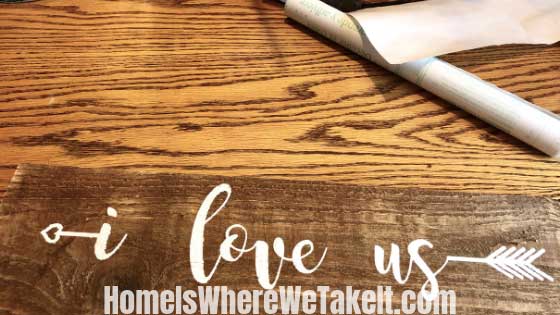
After thinking about it more, I decided on “Our Adventures,” because that’s what our little camper is all about, and “I love us,” because really…I really do love us!
Here’s what I ended up with.
RV DECORATING IDEA: DIY STEPS
Let’s talk about the DIY steps involved. My material was simply 1″ x 6″ cedar fence planks left over from another project. If you don’t have one laying around, I’d still recommend them because they are CHEAP, and they are LIGHTWEIGHT!
STEP ONE: MEASURE, CUT, SAND
Measure the wall you want to hang the photo board on to determine how long your board should be.
My wall was 32″ wide where the pics had room to hang, so I decided on 24″ wide for my board. I realized I’d have enough left over for a second board, but not enough for 24″, so I made the second one 18″ wide.
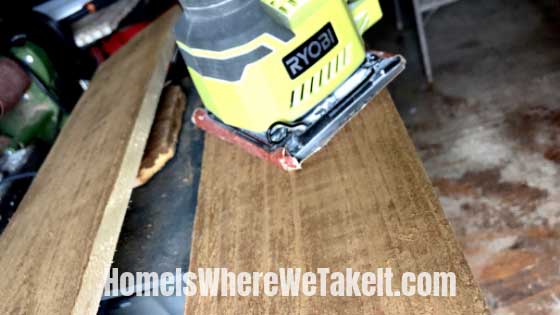
Cut boards to size and sand to achieve your desired smoothness. Be sure to sand the edges so it won’t snag you after it’s hung.
STEP TWO: PREPARE BOARDS
Determine your saying and your colors. I wanted the board to look rustic, so stain was perfect for me. There was also some milky-white paint laying around, so white it is for me! My paint color was Sherwin Williams Alabaster if anyone wants to know.
Stain or paint your boards accordingly and allow them to dry (mine were previously stained before this project). If you want a darker background, obviously, lighter letters will be best and vice versa.
STEP THREE: PREPARE & PAINT LETTERING
Determine the saying you want. As I said, since mine was for our camper, I wanted it to mention something about our travels.
Once you’ve decided on your saying, you need to find a font and a way to transfer it to your sign. I have a Cricut machine, so I made a stencil with vinyl.
If you have a Cricut, make your stencil and stick it to the wood (the more you sand, the easier this is…wipe the wood down after sanding).
If you don’t have a Cricut machine, Refresh Living had some great pointers on how to transfer lettering without one. It’s pretty straight-forward. It is time-consuming, but it beats my handwriting any day of the week.
This is a method I learned when I was WAAYYY younger, so the transfer method has been around since before printers were common! I think we were still using dot matrix printers when I learned this method! LOL!
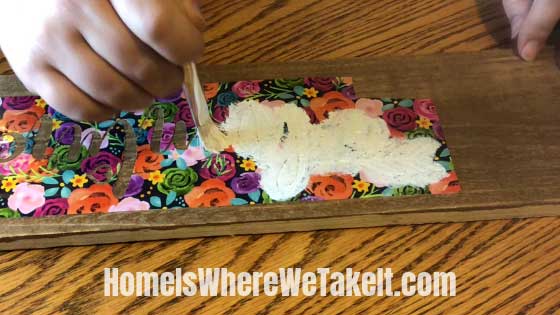
After transferring or affixing your stencil, paint the letters.
Of course, if you have beautiful handwriting, AREN’T YOU PRECIOUS?! 🙂 Write those words on there beautifully and enjoy your handiwork!
My last step here would be to lightly sand over the letters just to make them look no so store bought.
STEP FOUR: ATTACH THE CLOTHESPINS
Now, if I was going to stick to my original idea, this is where I would figure out a way to attach twine to my board.
If you want to use twine (I just couldn’t find any around the house and didn’t feel like going to the store), I would either use eyelet hooks (affiliate link…but there’s like a million in that package…check out your local Walmart for smaller packages) or furniture tacks (same deal, affiliate link just to show you what they are) to hold the twine in place.
Use as many hooks or tacks as you see fit depending on the length of your board. For either of my boards, I probably would’ve only used two hooks or tack and tied the twine very taut.
Obviously, I skipped this step due to a lack of twine. I just pulled out the hot glue gun and stuck those babies directly on the wood.
STEP FIVE: ATTACH THE BOARD TO THE WALL
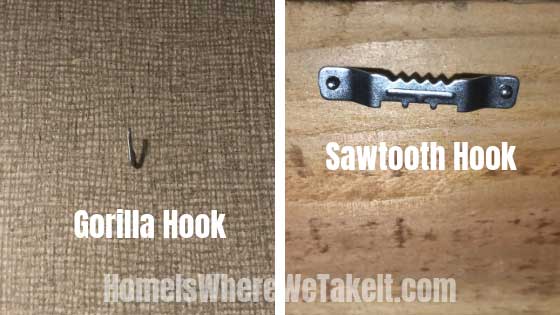
I’ve mentioned before on this blog that Ashley Mann over at RV Inspiration is one of my favorite RV bloggers. She’s got a great post on hanging things in your RV. After rereading that post, I decided on sawtooth picture hangers for my boards and gorilla hooks for my walls (sorry for the affiliate links with 10 million products in one package…it’s just so you can see what I mean!).
I’m not super excited about poking holes in my walls, but the gorilla hooks are minimally invasive, so that’s why I chose them.
Check out Ashley’s post for ideas on how else you could do this, but I felt that anything sticky would not stick on rough-hewn wood since I didn’t sand mine smooth.
IMPORTANT TIPS: remember that you are not punching the gorilla hooks through sheetrock. You WILL need to use a drill bit, or nail, or some kind of hole punch to get the gorilla hook through the wallboard in your camper. Don’t make the hole larger than you need!
Also, keep in mind that you WILL be moving the camper from time to time. I only put one sawtooth hanger on my boards. In retrospect, I should’ve put two on each for stability. Most likely, I will take mine down to travel.
STEP SIX: PICK YOUR PICS!
This is the hardest part for me! I thought I’d go into my Google photo account and print out a handful of pics from our travels last year. THAT WAS CUTE!
42 pictures and $12 later (not joking), I had some decisions to make. My main decision will be, where the heck will I put 18 more of these boards in my 21′ camper! LOL! Maybe I could do a whole wall? 😉
For the example, I just grabbed some of my pics for the sake of this post, but seriously…I may need another package of clothespins! At some point, I may also add another board to the bottom of this so I can add another row of pics. If I do, I’ll update this post, but I doubt I’ll do it.
MORE RV DECORATING IDEAS
DISPLAY PICTURES
Of course, you had to know I’d say this!
Look, people, these RVs are our home away from home…heck for some of us, they ARE OUR HOMES! Not me yet, but I’m aware you’re out there. If you’re gonna be in them for any period of time, even just a few weeks out of the year, shouldn’t we make them feel like home?
My oldest daughter is a photographer. She says printing pictures for our enjoyment is becoming a lost art. Print pictures to make your RV homier.
ADD A SPLASH OF COLOR
RVs nowadays are about as blank of a canvas as you can possibly get. Try adding color to make them feel homier. I have added some navy blue blackout curtains to mine and while I’m not TOTALLY in love with the color, I love their functionality. One thing I considered was to add some iron on vinyl arrows to my navy curtains to spruce them up a bit.
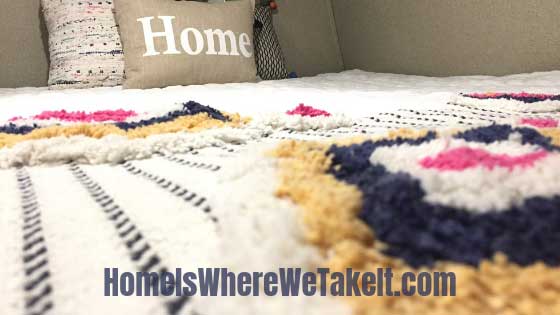
Leave a blanket out to add color. Since our bed is basically in our kitchen, I use a little lap blanket to add color to my interior. It’s not too “in your face,” but it’s just enough visual interest to give the place some umph! You could also get colorful comforters to add color.
I know the menfolk fuss about adding fluff, but seriously, a couple of little throw pillows go a long way to making an RV feel like home. Try putting some on your couch, chairs, or bed.
If you wanted a farmhouse look, you could add pallet wood around your windows.
FORM AND FUNCTIONALITY
Organizing is a HUGE part of taking advantage of RV decorating ideas! If you keep the junk at bay, your camper will look clean and tidy!
Check out this post about organizing your kitchen. Using bins takes advantage of vertical space which would otherwise be unused or WILDLY unorganized (thinking about a friend’s cupboards that used to have bags and bags of chips piled sky high in them!).
Don’t forget to use vertical space on walls also to take advantage of otherwise unused space. This is why I chose to do my picture board since I don’t really have free counter space in my RV. (I’m working on more pics for you, just ran out of time.)
ADD PLANTS
This is something I’m guilty of, but I do LOVE the look. There’s just something about having some greenery in your camper. We don’t have a lot of counter space, so if I was to add greenery, it would have to be on the walls.
I’ve seen pictures of people using towel rods to hang containers from (Google search “plants in an RV” for ideas), but I would most likely use Urbio Magnetic Containers to do it.
I just like the clean look of them, plus I have some laying around from when I worked at The Container Store. That 40% discount was my FAVORITE PART of working there!
FIND INSPIRATION
If all else fails when looking for RV decorating ideas, look to the pros for inspiration. If you haven’t already, I’d follow RV Inspiration on Pinterest. She also has a post about 11 RV makeovers on Instagram.
Google and Pinterest are the perfect places to start when looking for any RV decorating ideas, too! Anything you want to do has already been done…you don’t have to reinvent the wheel! Find someone who has already done what you want to do and follow their lead!
TYING LOOSE ENDS
I hope all this helps! Sometimes I’m in a loss for things to do with my camper because it is so small, but I feel like we still deserve to have a tiny slice of home when we’re camping.
It’s important to me to be as comfortable as possible and that means making my place homey!
If you like beads and tie-dye, then, by all means, do what you must to make your RV home! My poor hubby is subjected to a blanket that has pink, orange, and yellow! I love you, honey!!! 🙂 That’s my need for color…not his.
What he doesn’t know is that I’d have matching giant pom-poms hanging from our storage shelf if I thought I could get away with it!
What do you think? Do you have more RV decorating ideas you’d like to share? Feel free to drop some in the comments! I always love to hear your ideas, too! This road we’re on isn’t a one-way street!




Leave a Reply