I saw a post this week by another RV blogger this week that inspired me! We’ve had to make RV repairs on the fly and DIY (HEY THAT RHYMES!)…it’s not fun when it’s happening, but if you have the right tools with you, it’s doesn’t have to be a HUGE deal.
If you want to read the post that inspired me, check out this post from Ashley Mann over at RV Inspiration. She’s got a BUNCH of great tips and really does have some inspiring things there! Bless her heart, it sounds like they had a time of it the first year or two.
This post may contain affiliate links that if clicked, I may earn a small percentage of the sale which will cost you nothing extra. Please read my affiliate disclosure page for any further questions.
RVS ARE MEANT FOR RECREATIONAL TRAVEL
First things first, let’s talk about the elephant in the room. RVs are big, strong, and durable machines, this is true. However, they are also homes on wheels. These homes get jostled about in a way that homes just aren’t meant to be jostled! I know they’re made for travel, but things come loose, get broken, and yes, things need upkeep.
The best rule of thumb for both full-time RVers, and weekend warriors is to keep a basic toolkit somewhere in your camper or vehicle for RV repairs because YOU WILL NEED IT! It’s not a matter of “if,” but “when.” If you just plan on making repairs, you won’t be upset when they pop up!
RV REPAIRS WE’VE MADE
Fortunately for us, our list of RV repairs are mostly due to our own preference. We had a couple of panicky situations, but they turned out to be not too big of a deal.
We purchased our 2017 Keystone Hideout in May of 2017…at the time of writing this, about a year and a half ago. Here’s a list of repairs/changes we’ve made in that short amount of time on our brand new camper.
- Added various storage updates – immediately after buying (can storage rack, spice storage, paper towel holder, key hook)
- Removed closet rod and installed shelves in its place – immediately after buying
- Installed a TV mount – immediately
- Reinforced table to prevent sway when used as a bed – immediately
- Worked on AC unit on our second trip (July 2017 and again in Sept. 2018) – high humidity caused AC to drip on our guest bed where our daughter was sleeping, this was our first true repair job, 2 months into camping!
- Replaced a jack (sometime around October 2017) – jack got twisted when driving over low terrain
- Replaced toilet water valve (March 2018) – we didn’t properly prep the valve for winter and it broke when it froze.
- Removed cheesy original mattress (April 2018)
- Updated under bed storage (May 2018) – even though this was an optional update, the trim had already shimmied loose and needed repair anyway.
- Glued trim back on the ceiling (June 2018) – a shoe had been holding it in place for weeks 🙂
- Replaced toilet water valve AGAIN (June 2018) – valve blew due to too high water pressure. We had to buy a water pressure regulator and a new battery for the Pathfinder too…that was a fun trip!
- Added blackout curtains and removed some of the original mini-blinds that were broken (July 2018) – I hate those stupid mini-blinds…ask me how I REALLY feel about them! LOL!
Now, there’s nothing too alarming about this list, but the point is, it was a BRAND NEW camper when we bought it. A lot of these RV repairs were our choice to do, but we’ve done all of these things DIY.
A GREAT RESOURCE
 The first and most important tool isn’t a tool at all, but a resource. You’d be surprised what all you can find on YouTube! Yep…if you need to make a repair to your RV, search YouTube first.
Our first really serious DIY RV repair was when somebody other than me (not naming any names here) drove our camper over a levy and drug our camper jack on the ground when crossing the levy. The friend we were visiting thought he could fix the jack, but nope…that didn’t happen. This repair only involved crawling under the RV, removing some screws and the old jack, then screwing the new one onto the frame.
If you need to repair a jack, search the internet for your make and model of RV to find what kind of jacks you need. Chances are pretty good you’ll find them on Amazon. That’s where we found ours, and it was a 2 pack for less than $50.
The next repair was when the valve broke on our toilet water supply. We did our own winterizing and didn’t think to push the foot pedal to release the tiny bit of water in the valve. This water froze and caused the valve to break. Guess what? There were videos on YouTube on how to replace that valve! I couldn’t believe it either, but there they were…the internet amazes me sometimes!
Just in case this has happened to you, here’s the valve on Amazon. I would post a YouTube video, but they’re all kind of obnoxious! Why do these guys talk so much?
TOOLS YOU MAY NEED
It’s so hard to try to anticipate every tool you may need, but there are a few I wouldn’t leave home without.
Funny, I have two posts on things you need for RV camping, but I have embarrassingly few tools on those lists. One is my post on things you need before your first RV trip, the other is more of luxury items…things you will eventually want.
Please understand that this list is by no means comprehensive and that you will need to add your own tools as you see what kind of needs you will have.
- Cordless drill – we use ours every single time we set up and break down camp to lower and raise our jacks. Drills can also be used for any number of repairs or remodeling projects.
- Cordless circular saw – it might be kind of heavy duty, but when you need one, you just need it. If we were full-timing, I would DEFINITELY have one on board!
- Heavy duty battery for cordless tools – I got Glynn (wink, wink…yeah, I’m a girl that loves tools) one of these for Christmas…LOVE IT!
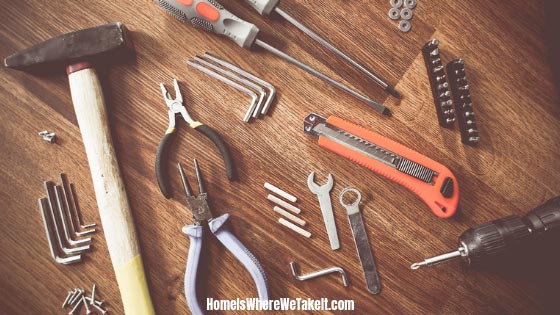
- Basic tool kit – this kit covers all of the basics. It contains a hammer, tape measure, razor knife, ratchet, sockets, screwdriver tips, pliers, needle nose pliers, standard and Phillips screwdrivers, allen wrenches, and a level. Consider a more extensive socket set when time and money allow.
- Caulk gun – I don’t keep this in my RV now, but when we go full-time, I will certainly have one on us. They’re just useful for caulking, gluing, sealing, etc.
- Other than these few things, I might keep some duct tape, wire connectors, electrical tape, and plumbing tape…oh, and a drill bit set.
As I said, this list is by no means exhaustive but should cover any basic DIY RV repairs you should encounter.
ATTITUDE IS EVERYTHING
Just because you’ve never done RV repairs before doesn’t mean you CAN’T! It just means you haven’t. If money is tight, it never hurts to TRY TO DIY your RV repairs first! Have a positive attitude, tell yourself you can at least try, and start looking for help on Google, Pinterest, or YouTube.
DO YOUR HOMEWORK FIRST – search on YouTube or on Google, see if you think it’s something you can tackle and give it a shot. Read, read, read, then read some more (or watch videos as the case may be)!
KNOW YOUR LIMITATIONS – if the repair is electrical or engine related, it might be best to leave it to the pros! More complicated plumbing issues might be best left for the pros too.
CONSIDER A WARRANTY – if you follow the link above to RV Inspiration, you’ll learn that a warranty is what saved them from shelling out a small fortune in RV repairs!
BEING INDEPENDENT
Remember, the more RV repairs you can do on your own, the more independent you can be. When our water valve broke FOR THE SECOND TIME, we were dry camping in Nashville, TN. Glynn turned off the water, cut our supply line and shoved a wooden spoon in it. A nearby store had the supplies needed to fix the valve, so it didn’t take long to get us back up and running.
Since he had already repaired the valve once, he knew exactly what to do and made quick work of it. He had to do some creative patching on the supply hose (he shoved a wooden spoon end into the supply hose and clamped it in there). His basic knowledge of plumbing did come in handy, so it wasn’t too hard. Looking at the project, I actually think I could’ve tackled it given the right circumstances.
My point is, fixing this problem ourselves kept us from having to uproot and find an RV mechanic somewhere. We were able to carry on with our weekend with very little interruption. Being positive and creative can go a long way when trying to do your own RV repairs.
There’s another great resource if you’re on Facebook. There’s a group called “RV Tips.” This could be a FANTASTIC way to reach out to other RV owners for help troubleshooting. As of Sept. 2018, there are 131,000+ people in the group.
So, what’s your story? Have you ever had to make emergency RV repairs? How did you deal with them?



Great tips! Everyone definitely needs a handyman or YouTube when they have an RV.
It’s never-ending, isn’t it? I’m so thankful for YouTube! We fixed that air conditioner again this weekend thanks to YouTube and my handyman! 🙂